3 Types of Perfect Bridal Bun Hairstyles

Sponsored Post

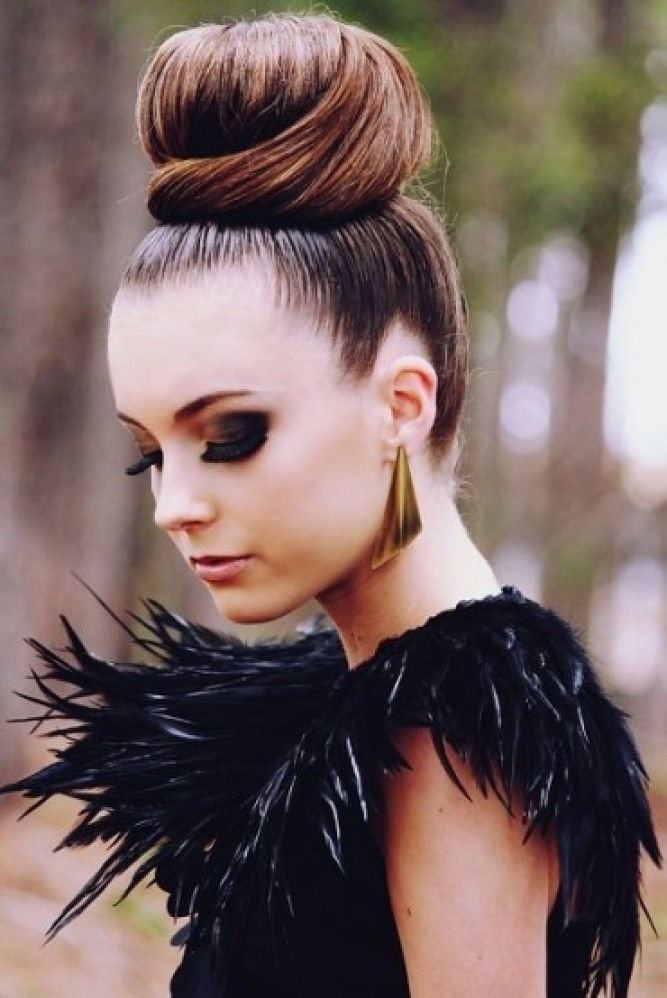
A bun is probably the simplest and most elegant hairstyle to wear on your wedding day. Not only does a bun keep your hair tidy, it also gives you ample opportunity to flaunt a low cut back, chandelier earrings or beautiful necklace to full effect.

There are several kinds of buns you can experiment with before deciding which one to sport on your big day. Here are a few of the trendiest buns of the season and how to style them:

1.Traditional bun

how-to-master-the-chic-chignon-1-size-3


An Indian bride is an epitome of the deep-rooted traditions and culture of her country. A traditional bun is the all time favorite of brides all over. Comb your hair well and secure it in a ponytail. Divide it into two sections and wind them over each other to create a bun. Secure it well with bobby pins and spritz well with a medium hold hairspray. You can opt to add hair bun accessories such as a hairnet, hair jewelry, flowers or a coiled floral garland to finish the look.

2. Messy loose bun

unfussy-up-do-2-size-3


A loose and messy bun will give you a chic laid-back look. The messy version is a good hair bun for short hair. Pull your hair into a loose ponytail. Divide the hair into two sections and back-comb them to get volume and texture. Now start wrapping the hair in opposite directions and secure the sections about an inch from the bottom of the strands. The loose frayed ends around will add to the messy effect. You can also pull a few strands to frame your face.

3. Spanish bun

Bridal Bun

If you have long and thick hair, then undoubtedly a Spanish bun should be your choice. This hairdo looks best on round faces. It is a sophisticated and quirky looking hair bun style. To get a Spanish bun, make a deep side parting and make a ponytail by looping a rubber band three times around your hair. However, on the last loop do not pull the hair all the way through. Let a small part remain looped at your nape and wrap the remaining end around the rubber band concealing it completely. Secure it with a bobby pin. You can add flowers at the nape for an authentic Spanish look.

These buns are some of the most chic hair buns for Indian weddings. You may opt for any of these stylish buns for your wedding or reception. You can always dress the bun up or down by adding accessories or removing them.

Learn more DIY Hairstyles at www.rewardme.in

5 Types of Bridal Braids

Sponsored Post

Braids are the perfect way to complement Indian attire for bridal functions. Not only are they beautiful and sophisticated, they are also low maintenance and allow you to enjoy your big day hands free without trying to manage your tresses all the time.

Some of the braided bridal hairstyles are:

1. Side braid

hair-6
The one-sided look is stunningly attained with the side braids. If your dress is worked on a single side or along the neck, then this hairstyle will ensure that it is easily flaunted. To get a side braid, you first need to make a side parting. Take a section of your hair and begin by making a regular braid. Extend it till the end of the ear. After this, take the hair from the opposite side and pull them horizontally in the front. Continue doing this till all the hair is braided. Finally, tie the hair with a rubber band from the bottom and add flowers at different levels.

2. Crown braid

A crown braid looks like a braided crown set on your head; very lady-like and old world. There are many different ways to create one; among the easiest is the two-braid method. Divide your hair into two sections along a really deep side parting. Start braiding hair from close to your forehead (above your left ear) from the smaller parting. Keep including one-inch sections of hair from the larger parting as you move towards your right ear. Continue till you reach below where you started. Complete the braid and secure with a rubber band. Pull this last braided section over your head once more and tuck the end into the braid, secure it with a bobby pin. Spritz some holding spray and your ‘do is ready. You can also tuck in small flower buds or seed pearls along the braid for a fresh, princess-like look

3. Braided bun

hair-9

The braided bun is the most fuss-free hairstyle to carry on your wedding day. Amongst the various versions of the braided bun, this is perhaps the simplest. Divide your hair into two sections. Create 4-6 tiny plaits on each side of the partition. Take the rest of your hair and make a bun using hair grips. Finally, take the hair braids and fix them into the bun with bobby pins.

4. Fishtail braid

6-quick-easy-steps-to-a-fishtail-braid-1-1-size-3

A fishtail braid complements Indian attire perfectly. Begin a fishtail braid by gathering your hair at the nape of your neck. Divide it in two sections; keep taking smaller sections from each of these two strands and cross them over the opposite section until you reach the bottom. Secure with a clear rubber band and your neat and elegant fishtail braid is ready.

5. Waterfall braid

This style of braiding allows you to leave your hair loose while keeping flyaway strands of hair off your face. It is a perfect look, simple to create and easy to maintain. To begin with, start making a normal braid with three strands from your hairline just above your ear. Begin adding strands as you encircle your head. Keep braiding until you reach near the opposite end. Finish the braid and pin it up diagonally or horizontally.

These styles add a twist to traditional Indian braid hairstyles creating a touch of the ethereal and unusual to your hairdo.

For more DIY hairstyles & tutorials visit www.rewardme.in

3 Simple Side-Swept Hairstyles for Brides

Sponsored Post

Your wedding attire is ready. You have bought your jewelry, chosen accessories, picked up the right make-up, and now all that remains is deciding on a beautiful hairstyle that will complete your look on your big day.

A side hairstyle is a great option and can be tweaked to complement a vintage, traditional or modern look depending on your choice of outfit. Such a style can suit women with long and medium length hair. A side-swept hairstyle ensures the front and back of your dress remain in full view. It also frames your face without overwhelming it.

Some of the best sideways hairstyles trending as bridal coiffures these days are as follows:

1. Bun

3_All_Day_Braided_Updos_2

A messy side bun looks pretty when you paired with a vintage gown. You also get a chance to flaunt your dazzling chandelier earrings. A side bun ensures that your hair stays off your nape and doesn’t get entangled with jewelry or the embellishments on your dress.

To make a messy side bun, gather all your hair on one side and secure it in a ponytail. Divide your hair into sections and comb them in a reverse direction. This is known as back-combing, and it adds volume as well as increases hold. Pin up each section upwards to complete the bun. If you sport a fringe or bangs you can twist them once and pin them for a classy 60s look, or leave them be for a fun flirty look to complement the bun.


2. Braids

7-genius-hair-care-tricks-that-really-work-1-size-3

Braids give a sophisticated yet unfussy look to a bridal get up. Braids well with western bridal wear such as gowns and dresses as well as with traditional Indian outfits such as sarees and lehengas. You could opt for loose or taut braids, and achieve the desired length of fullness by using extensions.

For a perfect side braid, part your hair sideways. Start with a regular French or fishtail braid from the broader side of your parting. After braiding it up to the ear-level start bringing over sections of hair from the farthest side to where you are braiding your hair. Secure the ends with a transparent rubber band. Accessorize the braids with flowers or seed pearl accents to complete your look.

3. Loose waves

Hair-colour-and-shine-5-size-3

Long hair left loose with a little bit of texture in the form of waves is a great way to get a dreamy princess-like look. Gowns, floor length dresses and even Indian wear such as backless dresses are perfectly complimented by this kind of hairstyle.

For perfect loose waves, work a mild hold gel through your hair. Curl two-inch sections around your curling iron and hold for 20 seconds. Continue until all your hair is curled, mist with a holding product. At the very end arrange all the hair over one shoulder and mist with a holding product.

These side-swept hairstyles are stylish, easy to achieve, and low maintenance. Try one of these and enjoy your big day feeling and looking on top of the world.

For more quick and easy hairstyles visit www.rewardme.in

L’Oreal Professionel Mythic Rich Oil Review

Loreal Mythic Oil Review

I haven’t posted in a while, but here I am back, reviewing a product I absolutely love. It is L’Oreal Professionel Mythic Oil which in my experience, works like a charm! Before I get into details, I have to say that hair serum is an important part of my hair care routine. My long tresses sometimes need an extra dose of nourishment to stay in place and so I have tried serums by many brands. But L’Oreal’s Mythic Oil has become my favourite for it delivers what it promises and is worth every penny spent.

I’ve finished two whole bottles already, and the third is half-way through! Clearly, I’m a fan.

According to the product info, Mythic Oil is a combination of Rice Bran oil and Argan oil, both of which are wonderful for enhancing hair quality. It can be used as construction product and for finishing as well. I usually use it either as a post-wash serum or before any sort of heat styling.

Now, getting to the product itself. L’Oreal’s Mythic Oil comes in plastic packaging with a pump dispenser for convenience. It has a clear sheen and soft, earthy fragrance that is disappears as the oil gets absorbed. On application post a hair wash, I use the serum to lightly coat the length of my hair, especially the tips. I avoid applying it on my scalp though. On application, it gets absorbed within minutes, leaving the hair smooth and silky when dry. The serum helps keeping frizz in check and if I use before hairstyling, my hair doesn’t seem too stiff after the heat treatment.

What I like best about this serum is its light, airy texture which does not weigh down my hair at all. Even though I get the most satisfying results when I apply it on my semi-wet locks, it works well even otherwise.

I have to mention though, that if you’re buying this product expecting it to moisturize your dry hair, that’s probably not going to happen. L’Oreal’s Mythic Oil basically reduces frizz, prevents fly-aways, tames the hair and makes it soft and shiny. But it doesn’t improve hair quality in general. Since I never bought it for that purpose, I’m happy with what it does do – control and condition my (sometimes) frizzy hair.

Star Rating: 4

Price in India: Rs 890

Price in UK: £15.99

How to Rock the Boho Chic Look

boho

The boho chic look is the most comforting fashion choice for the wild and free-spirited souls. That’s because it is all about individuality, a self-determined sense of style and no concern of the fashion police.

While to some people, boho stylistics is simply second nature. If you are like me, however, you have often admired women in fun, quirky outfits from a distance and wished you could pull that ensemble off. Well, not to worry. Even if going bohemian isn’t your natural style, you could want to and should experiment with it, especially if the occasion demands so.

Here are some ways in which you can nail the boho look perfectly.

The Clothes:

  1. If you are a classicist otherwise, when trying this look, you can go beyond your comfort zone. Beautiful prints and gingham fabrics in warm colours (which is the typical boho palette) shall look great. If your outfit is a two-piece ensemble, let one item be print galore with the other being one-tonal and plain.
  2. Layering is a very important part of the boho regime, so whip out those scarves, stoles, summer jackets and skirt-legging-combos. However, do not go over-board here either. A couple of layers provide much dimension to the outfit while still being elegant.
  3. Do not be under the misconception that boho means loose, ill-fitted clothing. The bohemian philosophy is one of comfort and thus there are few figure-hugging tight clothes worn with it. But that does not mean you consciously go for clothing that is oversized – simply find something comfy and fuss-free.
  4. When attempting boho, feel free to go in for alternate clothing of the kind that would otherwise be tricky to pull off. Funky pyjamas, jodhpurs, asymmetrical tops and dresses, funny text-tees, and similar unconventional pieces will all complement this look.

The Footwear

  1. Again, there are no rules here, other than that your footwear should be comfortable.
  2. Flat sandals and chappals are often staples in boho outfits. Go in for those in interesting colors or ones that have unique detailing. Remember, bohemian does not mean shabby – wearing your bathroom slippers, though perhaps most acceptable with this look, is not a requisite.
  3. Loafers and sneakers with quirky patterns will also look good.
  4. If it is winter season, boots with leggings over, are also so boho chic, especially if the leggings are very colourful.

The Accessories

  1. Nothing says boho like a bunch of accessories dazzling up an outfit in full measure. Actually, more than a bunch – this look can never have one too many.
  2. Chunky, beady neckpieces of different length, in varied colours look wonderful.
  3. Earrings with unusual motifs also look great. Many boho divas sport ethnic jewellery designs with western wear creating lovely visual contrasts.
  4. Bangles and wrist look super-trendy with this look as well.
  5. Other extras like hair accessories, bandanas, brooches, badges, caps, funky sunglasses and anything else you can think of can be easily fit into such an ensemble.
  6. The only thing to avoid is wearing so many accessories that they come in the way of your movement and comfort.

Hair and Makeup

  1. The hair with this look could be styled just about anyway.
  2. As long as there is volume and texture, anything works – loose waves and curls, messy up-dos, hasty ponies, even braids. If you are going for something simpler like straight hair let down, adding dimension using hair accessories would be recommended.
  3. With makeup, try and be slightly extremist – “all or nothing” is the perfect approach.
  4. If you’re going all out, you could try popping lip colours or dramatic, colourful eye-makeup. Make sure the effect is striking yet classy; avoid highlighting both the eyes and lips in an over-the-top fashion – let one feature stand out.
  5. If you prefer to go the barely-there way with makeup, slap on some tinted lip-balm and thin liner on the upper lash; you’re aiming for a more natural look, but you shouldn’t look washed out.

Follow these tips for a first-time boho outing and once you’re confident with all the experimentation, you can try out more bold outfits.


Chic & Easy Hair Trends for Hot Summer Nights

Summer is the best possible time to stay out long and enjoy beautiful nights. Days are scorching hot, but the nights get us some relief. When preparing for a joyful night out with friends or significant other, you should know that your hair might get in your way and ruin your mood – especially if it sticks to your neck making you feel twice as hot. Luckily, there are cute and easy hairstyles which will make you look good and feel even better wearing them.
Stylish bob
bob

Stylish, sexy, versatile, and classy – only bob hair can make you look like that. Long faces look fuller and wider with chin-length bobs, round faces look slimmer with slightly longer bob or an inverted bob, while angular faces should opt for the one parted on the side.

Choose the style you like best and wear it with pride – you will be attractive and gorgeous. Just make sure you wear it straight (or curly), you don’t want to look messy but classy.
Intricate braids
braids

Crown of braids will make you look like a princess and take the hair off your back – literally. You only need simple braiding skills, some hairspray and bobby pins, and a bit of patience. Make two low pigtails and secure them with elastics, then pull up one and secure it an inch back from your hairline and repeat it on the other one as well. Spray it with hairspray to make sure you don’t get strands of hair in your eyes.

Gorgeous ponytails
ponytail

If you don’t have the patience or the time to braid your hair and pin it up, you can always tie a ponytail and keep the hair up without too much effort. If you have bangs, you can always pin them to the side or make them look bigger with some hairspray. This will also add some style to this, usually unpolished look. You can also curl the ends of the ponytail and make it more classy.

Fierce pixie
pixie

Pixie cut is back and girls all over the world choose to wear it not just because it looks amazing, but because it is handy and practical at the same time. You don’t need a lot of time to get ready and wash your hair, and even less time to blow-dry it. You are ready for hot summer night in no time; just make sure your hair is on the spot and not flying all over the place. Use hair gels or finishing sprays – Theorie hair has amazing hair spray without mineral or paraffin oil for those who have keratin treated hair.

No matter if your hair is coloured, short, long, keratin-treated, curly, or straight; finding the perfect hairstyle is always a big deal. Hair trends change, but if you find a look you like in particular, there is nothing to stop you from wearing it for as long as you’d like.

Going for a Haircut? Know the Top 5 Styles Trending this Season

Hair

I have long, wavy locks which flow down past the middle of my back and every now and then feel the urge to change my hairstyle. Thankfully for me, my hair growth is not too slow so I’m not in fear of being stuck with a not-so-nice haircut for a long while.

But I understand that for girls whose hair takes a long while to grow feel very nervous about trying out new styles. Some wild, boho belles will ask, “What is life without a little risk? Go ahead, try that funky style that looked so great on XYZ model in some magazine”. Well, kudos on that attitude but maybe that’s not the best beauty mantra where hair is involved, at least for us lesser adventurous ones.

But if you are going in for a haircut and looking to get a different look this time, make sure you know which styles are trending this season. You can then choose one which suits your face shape, hair-quality and personality – you’ll then be perfectly turned out with your newly trimmed locks and extremely happy with the way they look.

These are the hairstyles that are super fashionable this season:

Baby Bob with WavesHair1

If 2014 was all about the Lob (aka long bob), this year has given way to the wavy Baby Bob. The Baby Bob is of length that’s somewhere between the chin and shoulders. Adding a dash of volume and textures, a wavy fall complements such hair length, creating an effortlessly chic look. Go in for a wavy Baby Bob if you want to try something radical. And the best part is, you get the added benefit of summer-friendly locks!

Very Long with Extra LayersHair2

So, you don’t want to chop off your precious locks that took ages to grow? Well, you could keep the length and still get a haircut that is contemporary and uber-stylish. Wait till your hair is very long – almost down to the waist – and then ask your hairstylist to add in as many layers as possible. This will add extra bounce and vibrancy to your glossy mane without much product usage and styling (if you have decent hair quality, that is).

70’s Bangs or a Side SweepHair3

Since 2015 has brought back many 70’s inspired fashion trends, hair couture has also gone slightly retro. A frontal fringe that is slightly shorter in the front with longer strands tapering down at the edges has lately been very popular amongst celebrities. You could get this look too, especially if you have naturally straight hair. But if that is not the case, and your locks have the tendency to “turn” as stylists put it, the side swept fringe would be an equally stunning alternative.

Curly Feather CutHair4

This is for the girls want their hair to be wild and forever messy (in the quirky, out-of-bed-look way, of course). You could get a feather cut, which essentially means your hair will have voluminous, wispy ends that curl out rather than in. Feather cuts on wavy and curly hair have been quite the rage for a while now, and can instantly add to your fabulousness with just a few snips.

Au NaturelHair5

Many stylists maintain that this is the season when simply embracing your natural hair texture will be quite the fashion statement. So instead of attempting to alter the general fall and character of your hair growth, you could get a haircut that enhances its natural qualities instead. This shall be suitable for those looking to grow their tresses out – take advantage of this trend and go in for a minimalist trim.

So based on what your fashion mantra is – experimentation, simple and comfortable styling or free-spirited novelty – find the perfect haircut to match it, and voila! Your look for this season is ready!

Chic Hair-Dos You Can Make in Less than 5 Minutes

FotorCreated

Have an important office event and running out of time to fix your hair? Or going out with friends but in no mood to make a fancy hair-do?

Well, you lovely lady, are suffering from either a typical time-crunch or ill-timed laziness, and that happens to all of us from time to time. But this is no reason for your beautiful tresses to go ignored and be subjected to uninspired and boring styling.

So we bring you some simple hair-dos which you can make in less than 5 minutes. They will give a chic edge to your look without taking up much time or effort!

The French Pony

French Pony


You’re too lazy to go all the way and make a French braid? No worries. Just plait the crown and when you reach your nape, tie your hair for a ponytail with a French twist. Way to class up the ordinary pony!

Braid Headband

Braided Headband

This is a great look for both official purposes and parties too. Take a small section of hair from behind your ear and braid it till the end. Then drape the braided strand across your head and secure with a bobby pin on the other side. Simple and stunning!

Cute Bow Hairstyle

Bow Hairdo

Slightly elaborate but very simple hairstyle to make. Take two sections of your hair, one from the left and right side each, tie together at the crown. Make another loop through the rubber-band but only push half your tiny pony through. Part the protruding bunch of hair in the middle and pin them to the sides to form a bow. Take a section of the remaining pony hair and loop between the bow divide. Secure with another pin. Beautiful!

Low Knot Bun

Low Knotted Bun


An easy-to-do hairstyle for office goers, low knot buns take just two minutes of prep. Divide your hair into two sections at the base of your head. Tie them like you would when knotting a thread. Make another knot if you have longer hair. Secure a rubber band at the end of the knots to form a knotted pony. Tuck the ponytail under the knot and use bobby pins to keep it hidden. Done in no time!

Use them Bobby Pins

Bobby Pins

This is for when you have no time at all. Whip out your stash of coloured bobby pins and use them to create a pretty pattern on your hairs. Looks great each time!


Trend Alert: Sock Bun

FotorCreated

I have been searching for the “perfect bun” for years now. In order to fit the bill, the hairstyle must be easy to create, last from morning till night and of course, be nothing less than chic. When I first laid eyes on the “sock bun,” I knew that I had finally found my match. As the name suggests, this bun is formed using a single sock. Let me show you how!

For starters, find yourself an old (clean) sock in a thin material. Ideally, the colour of the sock should match your hair colour as closely as possible to prevent any telling peek-a-boos. To prepare the sock for hairstyling, snip off the toe section with a pair of scissors so that you are left with a tube of fabric. Now, roll the tube inside out to create a shape that resembles a donut.

Next, sweep your hair into a high ponytail and secure it with a hair tie. Pull your hair through the sock “donut” and hold it in place at the end of your ponytail (the tips of your hair). Now, begin rolling the sock towards the base of your ponytail, taking your hair with it as you roll and ensuring that you spread your hair across as evenly as possible. As a rule of thumb, try to roll it downwards using the same motion that created the donut in the first place.

Once you have reached the base, tuck in any loose ends and secure your bun with bobby pins. Use hairspray to take care of any fly away strands. It really is that easy! To make your bun look slightly larger, gently tease the hair from the center of the bun in an outward motion.

Once you have practiced this look a few times, it will take you less than five minutes to create it, making it the perfect savior for those dreaded “bad hair days.” The cherry on top is that this look can take you from dawn to dusk and works equally well for office, brunch with the girls, shopping, weddings, dates and parties. Is it any wonder that celebrities like Lauren Conrad and Kate Bosworth are jumping on the bandwagon?


Photo Credit: 1 // 2 // 3 // 4 // 5

Three Fun Braided Hairstyles For The Summer

FotorCreated

Braided hairstyles are absolutely perfect for the summertime. Not only do they keep your hair out of your face; they also add a tinge of effortless elegance to any look. I love to experiment with different ways of braiding my hair. These three hairdos have made it to the top of my favourites list this year and I hope that you will enjoy them as much as I do!

The Classic Fishtail Braid

The timeless fishtail braid is your best friend on that bad hair day when nothing seems to work. While the end result is rather elaborate and elegant, this braid is really easy to create and will take you no time to master. Start by combing your hair to remove any tangles and brush it behind your shoulders. Divide your hair into two neat sections. To begin the braid, take a small section of hair from the outer edge of the right section and cross it over to add it to the left side. Now, repeat the same action with a small section of hair from the left side. Keep repeating these alternate actions until your braid is complete and secure it with a hair tie. It really is that simple, ladies!

The Beautiful Crown Braid

The crown braid, also known as the braided halo, has become a hot favourite amongst celebrities and with good reason, too. It is a gorgeous hairstyle that can be dressed up and down to suit the occasion. Begin the braid by brushing your hair and parting it down the middle to create two sections. At this point, I would suggest that you secure the left side with a clip so that you do not mix the sections while you are braiding. Start by braiding the right section as normal. Once you reach the end, secure the plait with a hair tie. Now, bring the braid over your head to form a headband and secure it in place with bobby pins. Next, repeat the same steps with the left section of hair. Use hairspray to take care of any loose strands and you are good to go. I reckon that this makes for a lovely date night hairdo!

The Fierce French Braid Bun

We all love a good French Braid from time to time, but have you ever thought about taking the hairstyle one step further? Start by creating a Side French Braid. If you need help with this technique, a quick search on the Internet should sort you out. Secure the end of the braid with a hair tie before proceeding. Now, twist the end of the braid around the base in a circular shape to form a bun. Use bobby pins to secure the braid bun in place and hairspray to tame any frizzy hairs. For the ultimate music festival hairstyle, add some fresh flowers to the bun. Voila!

Eight Easy and Effective DIY Hairstyles

DIY hairstyle

Bored of wearing your hair the same old way every day? Yep! Well, you’re in luck, because here are eight easy and effective hairstyles that anyone can do, and that don’t take a ridiculously long time! In fact, none of them should take any longer than ten minutes! So, whether your hair is long, or short, curly or straight, all of these simple and easy hairstyles will work for you!

Knotted ponytail
The knotted ponytail is an excellent variation on the ponytail. It’s super quick and super easy and, most importantly, super effective. This classy look can even be adopted for simply, elegant and understated evening wear. What’s not to love? Just grab your hair and divide into two sections, and then knot them just as you would a piece of string.

Twisted ponytail
Again, this is a really quick and easy way to transform your bog standard ponytail into something a little bit different. The twisted ponytail is best used for casual day wear. It’s just a question of inverting your ponytail by threading the tail through just above the hairband.

Single side braid up do
This look is great for when you really need to keep your hair off your face, and it keeps all those whispy little hairs around the face kept nicely away. Just do a simple plait on one side, no need for a french or a fishtail or anything like that, then gather it up with your ponytail and clip it neatly in place.

Low side knot bun
This super-classy low side knot bun is great for summer, keeping your hair off your neck. It looks great and if one of those amazing styles that looks complicated but is really easy to achieve. Just tie your hair in a low side ponytail and tie it in a knot in on itself. Fasten in place and you’re good to go!

Tuck and cover
This style works really well with shoulder-length hair. Just grab an elasticated headband, place it over your hair, and tuck your hair up and over and into it.

Invisible ponytail
This is perhaps the oldest ponytail trick in the book, and you can do it in one of two ways. You can either just take a strand of hair from your ponytail, or leave a strand out when you tie your ponytail. Then, just wrap the loose strand around the hair tie, covering it, and fasten it underneath your ponytail with a bobby pin.

Chunky side plait
To achieve super-full volume in your side plait, try using some hair spray or dry shampoo and backcombing your hair from about hallway down ever so slightly. Then, just do a normal side plait, but tie the end off before you get to the end of your hair. That way, you’ll keep loads of chunky volume.

Plaited bun
Much like the knot bun, this is a great variation on a regular bun. This style works particularly well for those with layers cut in, as it prevents pesky whips from poking out of your bun. Just tie your hair in a normal plait and then wrap it around itself, fastening in place for your super-chic bun.